Surf’s Up Patterns

The Itty Bitty Surf’s Up Pattern Bundle is perfect for anyone looking to add a splash of summer fun to their amigurumi crochet projects.
This charming set includes easy-to-follow patterns for a mini surfboard, a cozy beach towel, and a cute little bottle of sunscreen, all designed to be quick and satisfying to make. Ideal for beginners and those looking to improve their skills, these patterns use basic stitches and simple shaping to create adorable, tiny beach accessories that bring a sunny vibe to your amigurumi collection.
Now available as a free PDF download! Get the pattern →
-
Fluff Stuff Yarn in Royal Blue
Easy Peasy Yarn in White, Yellow, and Orange
4mm Hook
Scissors
Darning/tapestry needle
Learn more on the Tools & Materials page →
-
Single crochet (sc)
Half double crochet (hdc)
Increase (inc)
Slip stitch (sl st)
Slip stitch join (sl st join)
Invisible decrease (dec)
Chain (ch)
Front loop only (flo)
Back loop only (blo)
Surfboard
With white yarn:
| R1 | Start 6 sc in a magic ring | (6) |
| R2 | [2 sc, inc] x 2 | (8) |
| R3 | [sc, inc] x 4 | (12) |
Flip the piece inside out so the tail of the magic ring is inside.
| R4 | 12 sc | (12) |
| R5 | [3 sc, inc] x 3 | (15) |
| R6–12 | 15 sc | (7r of 15) |
| R13 | (switch to royal blue) 15 sc | (15) |
| R14 | (switch to white) 15 sc | (15) |
| R15 | (switch to royal blue) [3 sc, dec] x 3 | (12) |
| R16 | (switch to white) 12 sc | (12) |
Cut the royal blue yarn.
| R17 | [4 sc, dec] x 2 | (10) |
| R18 | [3 sc, dec] x 2 | (8) |
Do not stuff the piece.
Cut the yarn, leaving a tail. Thread a needle and pull tightly through the front loops.
Hide the yarn tail in the body.
Fin
Hold the piece with the top to the right and the bottom/stripes to the left. With white yarn, surface crochet:
Sl st join between round rounds 12 and 13 (at the color change) spanning round 13.
3 sl st spanning the next three rounds
Ch 2 and turn the piece
Dc into the last sl st
Ch 1, sc into the next sl st
Sl st into the next sl st
Fasten off and hide the yarn tails in the body.


Beach Towel
With white yarn, ch 16:
Tip: Remember, the first stitch after a ch should be in the second stitch from the hook.
Tip: For a cleaner look, start the color change in the final stitch of each step. Don't carry over the yarn at color changes. When complete, weave all the tails into the same side of the towel to hide them.
15 sc
(switch to yellow) ch 1, 15 hdc
(switch to white) ch 1, 15 hdc
Repeat steps 2 and 3 two more times for seven stripes.
Weave the yarn tails into the back of the towel.
Sunscreen
With royal blue yarn:
| R1 | Start 4 sc in a magic ring | (4) |
| R2 | 4 sc blo | (4) |
Tip: Flip the piece inside out before completing round 3, it can be easier to do on tiny pieces.
| R3 | (switch to orange) [sc flo, inc flo] x 2 | (6) |
| R4 | 6 sc | (6) |
| R5 | [2 sc, inc] x 2 | (8) |
| R6–7 | 8 sc | (8) |
Label


Embroider the label with royal blue yarn:
Insert your needle through the back of the tube and pull it out between rounds 6 and 7, two stitches from the left.
Insert the needle one round up, between rounds 5 and 6 and pull it out one stitch to the right of stitch in step 1.
Insert the needle back into the same hole between rounds 5 and 6 and pull it out the original hole between rounds 6 and 7.
Repeat steps 1–3.
Insert the needle one stitch to the right and out the same hole in the back, and shape the yarn to create a circle.
Tie a knot and hide the tails.
With Y yellow yarn, embroider a half circle over the top of the label:
Tip: This is like making an upside down smile.
Insert the needle through the back of the body and through the same hole as the bottom of the blue label, between rounds 6 and 7 and two stitches from the left edge.
Create a loop and insert the needle one stitch to the right, do not pull tight.
Pull the needle out the same hole at the top of the label between rounds 5 and 6 and wrap it around the loop of yellow yarn, inserting it back into the same hole and out the back of the tube.
Pull tight, and shape to create a border around the top of the blue label.
Tie a knot and hide the yarn tails in the body.
Add It to a New Project

This is a digital product, no physical good will be delivered. There are no returns or exchanges on digital products, all sales are final.
Give someone you love a big bear hug with this intermediate crochet pattern for Jordy the Bear!
Whether he's headed to a Pride parade, repping his favorite country's colors, or just dressed for the season, Jordy is endlessly customizable with four different pants variations to suit any occasion. With easy-to-follow instructions and photos, you can create your own huggable little legend in no time.
Plus, Jordy is compatible with all accessory patterns—so the fun doesn't stop once he's stitched!
Grab your hook and give the people you love the bear hug they deserve.
See below for additional details.
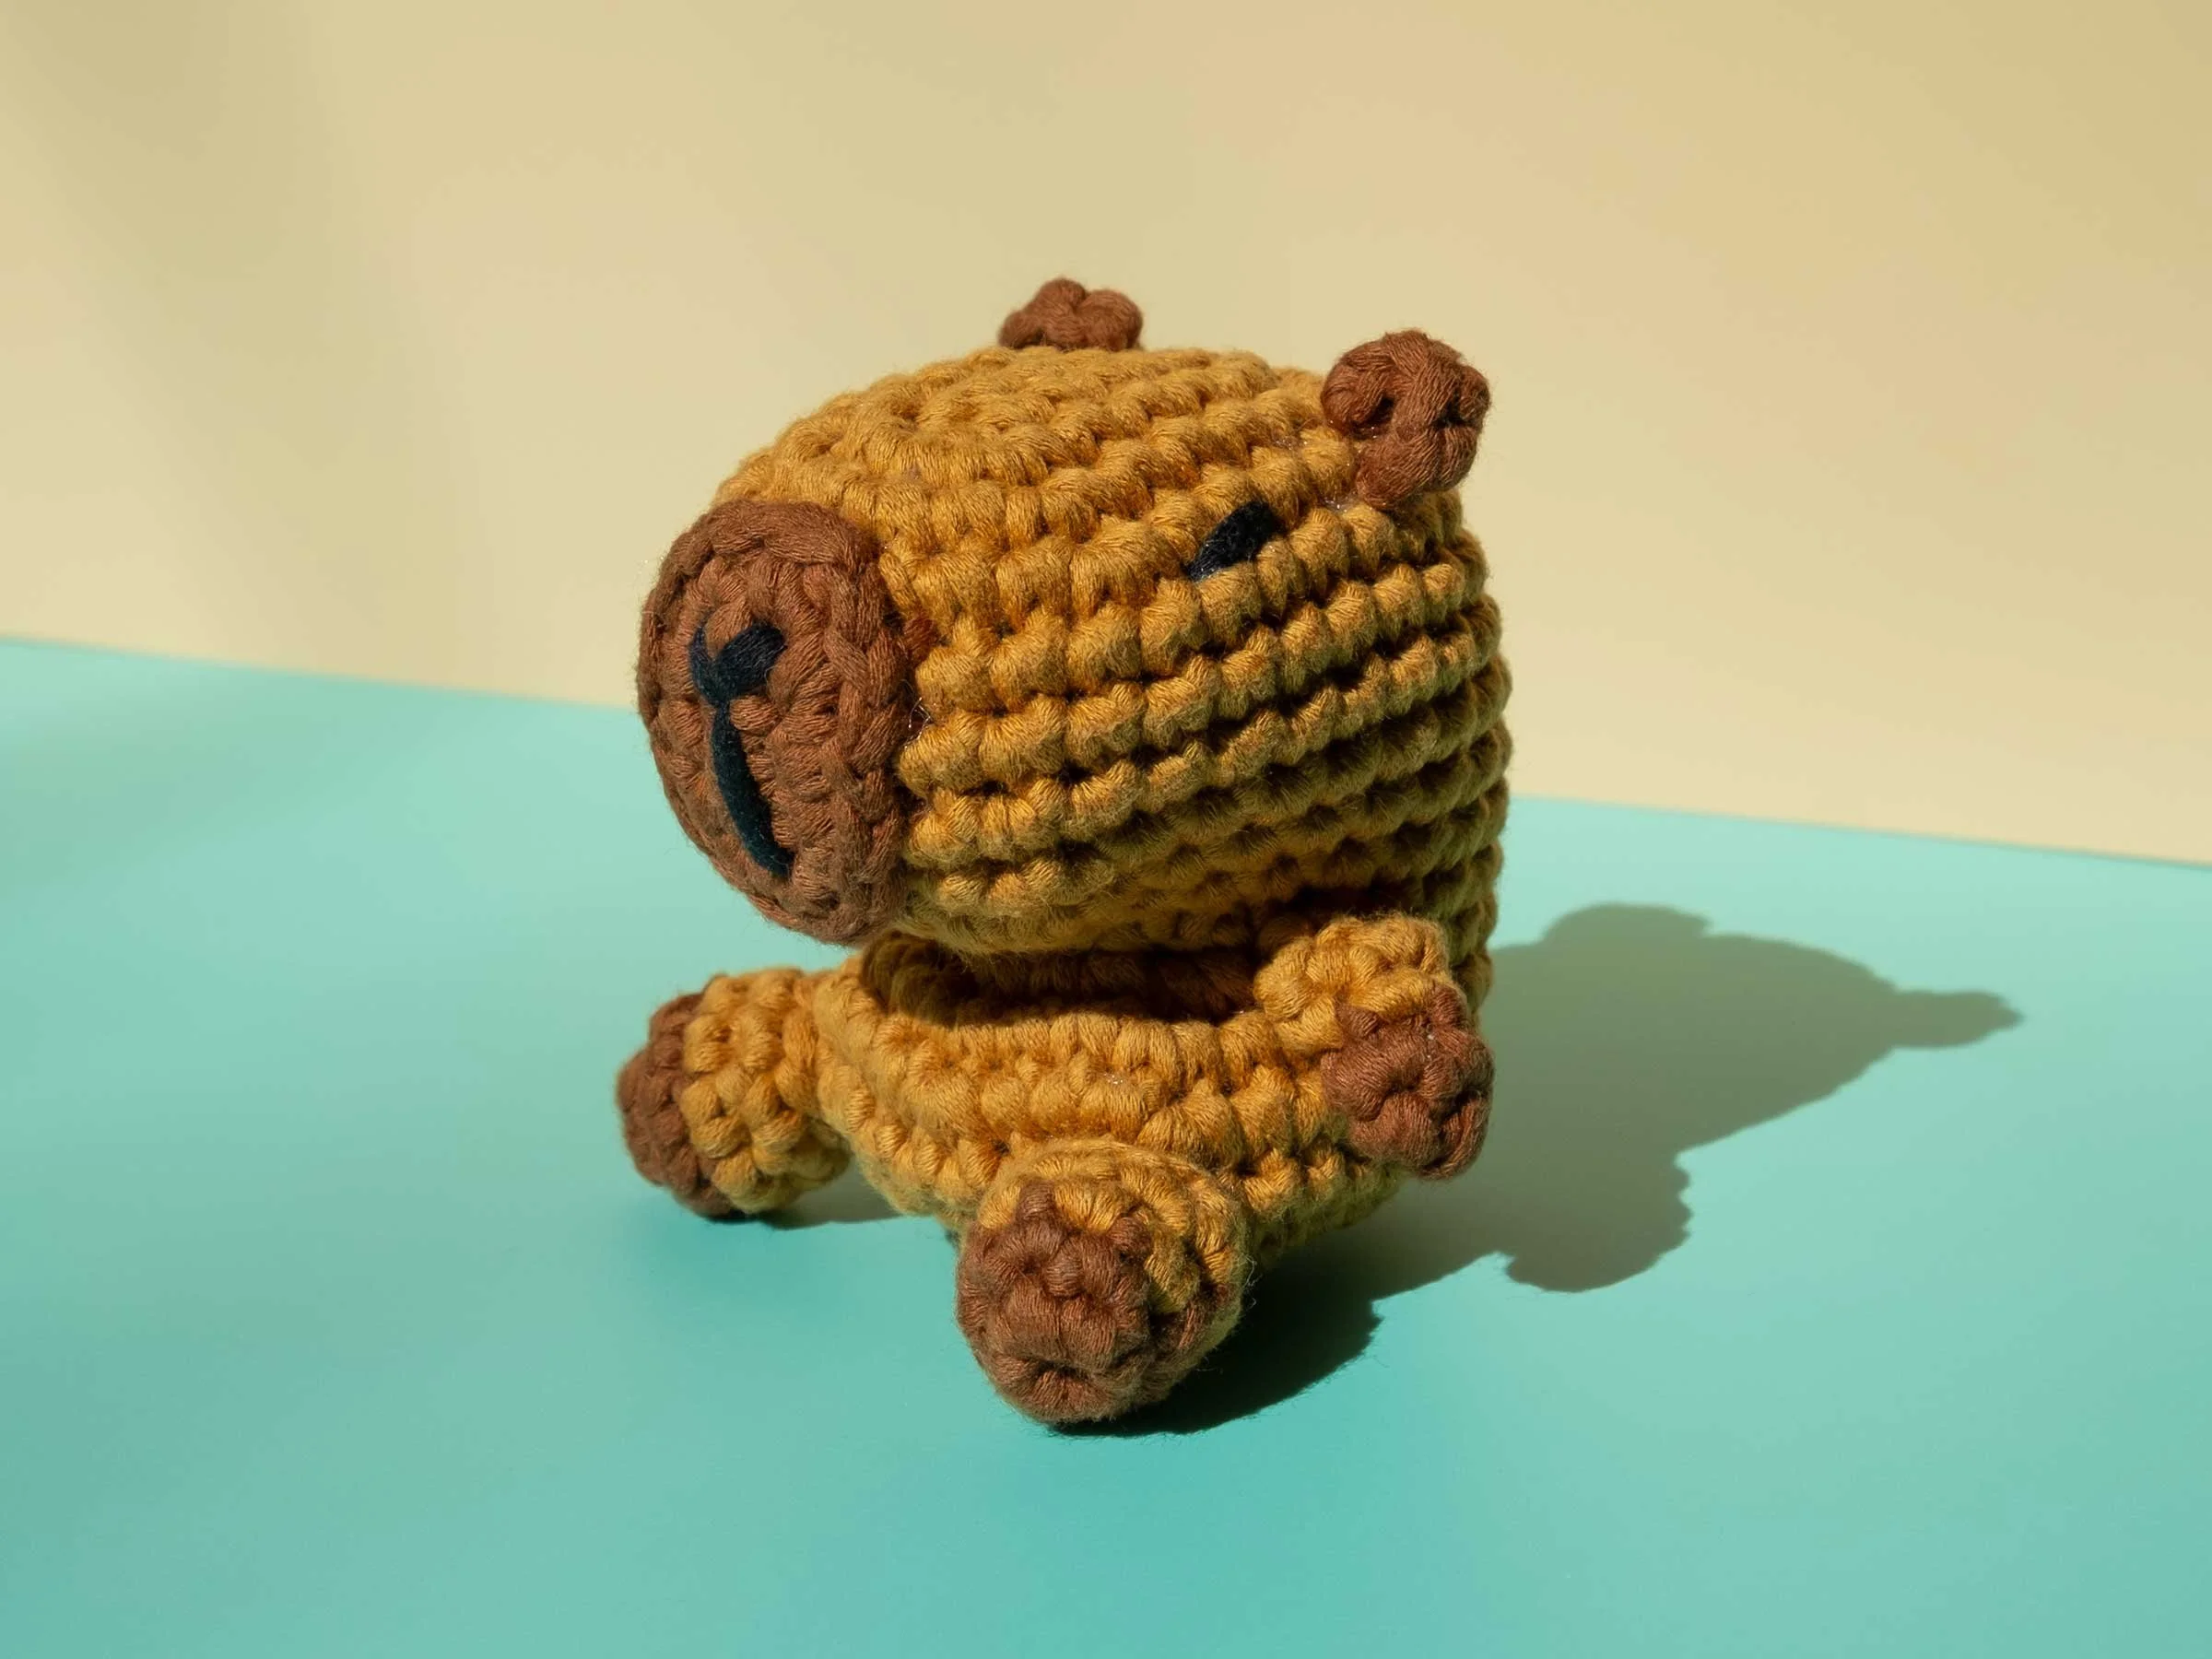
Chill out with Cai, the world’s most relaxed rodent! This beginner(ish) pattern is perfect for those who want to capture the "maximum mellow" vibes of everyone’s favorite capybara. Whether he’s lounging on your nightstand or acting as a tiny zen master for your workspace, Cai is here to remind you that there’s no problem a little quiet time can’t solve. Don't stress the small stuff—just grab your hook and embrace the calm with your new capy-buddy!
Don’t forget to make Cai an Itty Bitty Turtle Backpack & Orange!
Difficulty: ➀ ➋ ➂ ➃ ➄
See below for materials and techniques required to complete this pattern.

Soar into the festivities with Sam the Bald Eagle! This intermediate pattern captures the majestic spirit of the skies and makes a "soaring" addition to your patriotic celebrations. Whether he’s guarding the BBQ or watching the fireworks, Sam is a true blue (and red and white!) hero. To give him some extra star-spangled flair, don't forget to grab the free Itty Bitty Liberty Top Hat pattern available on the blog! It’s the perfect way to get Sam ready for the Fourth of July in style.
Difficulty: ➀ ➁ ➌ ➃ ➄
See below for materials and techniques required to complete this pattern.
Note: As an Amazon Affiliate, I may make a commission on sales of products linked from this page.